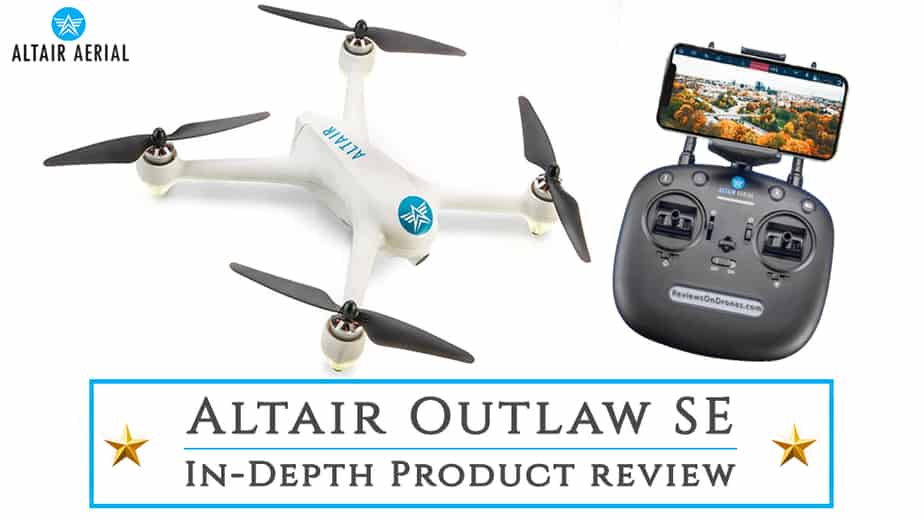
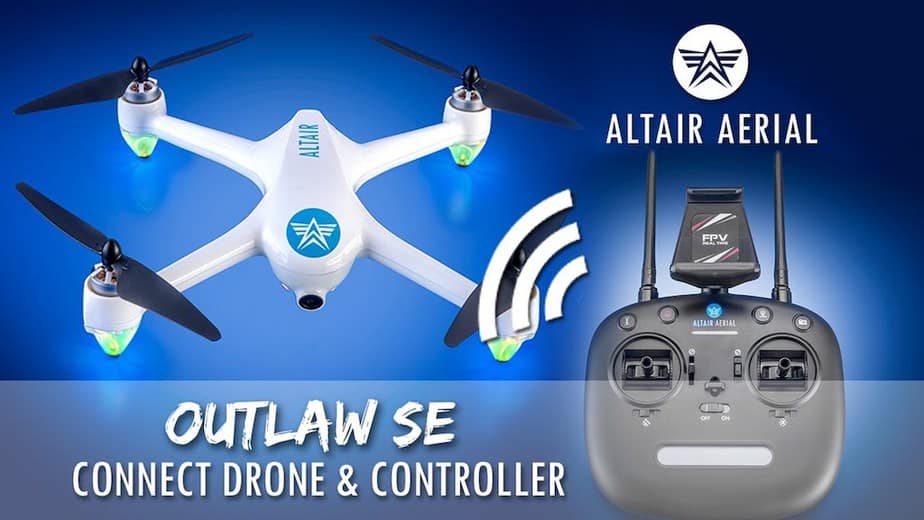
The Altair Aerial Outlaw SE (Special Edition) camera drone is almost as good as it gets for both newbie beginners and the more experienced intermediate level pilots who’ve got a budget of around US$300. Here is six reasons why.
- The Outlaw SE drone battery provides a generous flight time of between 18–20 minutes on a single battery. Multiple batteries will give you a lot more!
- The Outlaw SE transmission range can stretch up to a distance of 600m / 1968ft from controller, which is more than sufficient for most pilots.
- The Outlaw SE comes equipped with a built-in 1080p high definition fixed angle photo and video camera, plus you’ll have the option to see and record your favourite shots in First Person View (FPV) on your mobile device connected to the controller.
- The Outlaw SE can reach speeds of up to 25mph / 40kph thanks in part to it’s four brushless motors, which has been proven to enhance power and performance when a drone is in flight.
- The Outlaw SE has several GPS enabled auto-flight features, including Return Home, Follow Me, Waypoint, Gesture Mode, and Headless Mode, which enhances the flying experience, especially for beginners who aren’t particularly confident flying a drone manually.
- The Outlaw SE drone with controller will set you back around US$250, which makes this arguably one of the best value 1080p camera drones on the market at this price point.
Outlaw SE Price
Now, on the note of price, in our experience people typically make their decision on whether to put a drone on their shortlist based on four things, three of which we’ve just touched on above… flight time, transmission range, and camera quality. The fourth, but often most important consideration, is price… so lets drill down on that now.
If you shop around for long enough, there’s a good chance you’ll realise the sweetspot for this highly popular drone is around US$250. Anything less, and it’s probably worth buying there and then. Anything more, and you might want to wait.
However, drone prices are known to fluctuate slightly throughout the year, and their price does depend on when you’re thinking about buying, plus the availability of that particular product, at that particular time. We’ve monitored the Outlaw SE price for several months and that’s why we’re suggesting a price of around US$250 is probably going to be the best you can find.
If you’re interested to learn more about how Amazon have priced the Altair Aerial Outlaw SE, and to read some of their buyers reviews, click the button below and that will take you straight to the Altair Aerial products page.
What’s In The Box?
Alright, so we’ve highlighted some of the reasons why you might want to consider buying the Altair Aerial Outlaw SE. Now lets take a look a what’s included when you open the box, and what you can expect when you first take it to the skies.
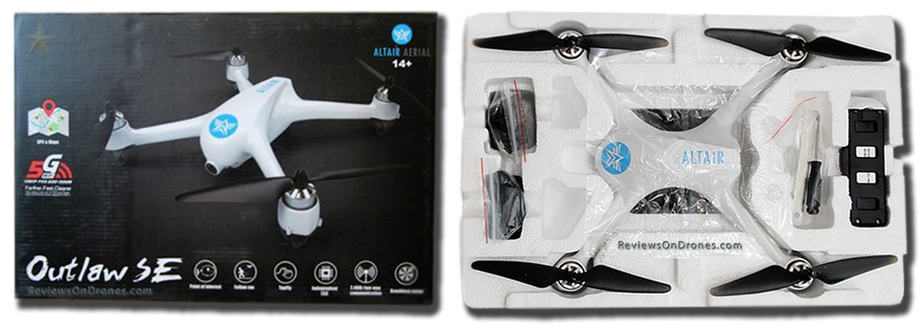
- 1x Outlaw Special Edition Drone Body
- 1x Remote Controller
- 1x Controller Phone Mount (for FPV)
- 1x 1080p HD Camera
- 1x 7.4V, 1800mAh LiPo Battery
- 1x Balance Charger
- 2x Sets of Propellers
- 1x Drone Toolkit
- 1x 19-page Instruction Manual
Outlaw SE Design + Build
The Outlaw SE is a fixed-arm drone, meaning it’s not foldable, but still small enough to be transported fairly easily in most travel bags.
The body dimensions are 25cm L x 25cm W x 7cm H, with four detachable propellers measuring a length of 19cm, which are mounted to brushless motors. Beneath each of the motors is the landing gear, and these are lit up beautifully by colourful LED lights.
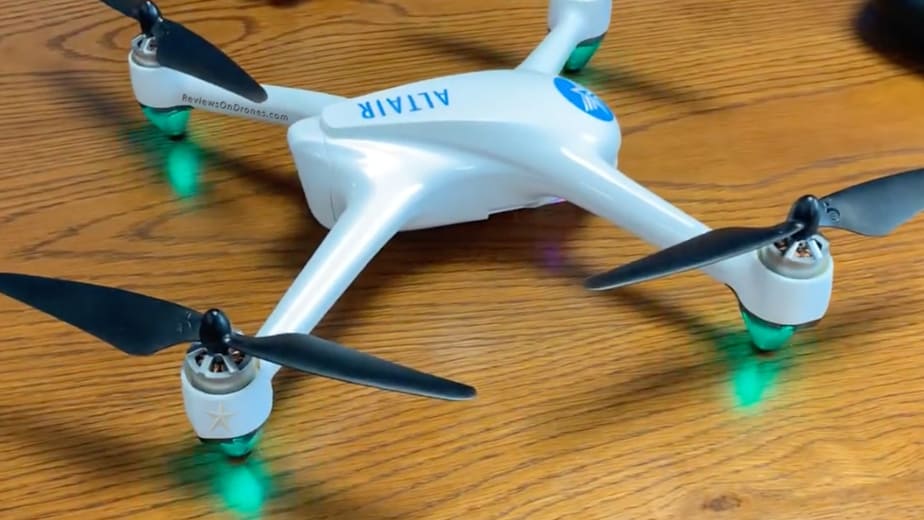
The body of the Outlaw SE is sleek by design and feels solid in the hand. Weighing in at a sturdy 1.2kgs, it’s tough and durable, built with white ABS plastic, and more than capable of taking its share of bumps and knocks.
The Outlaw SE is an outdoor drone (and not recommended to fly indoors). When you get it in the air, it’s stable in flight, meaning it holds its altitude really well, even in windier conditions, and it’s surprisingly quick and powerful, reaching speeds of 25mph / 40kph when you open up the throttle.
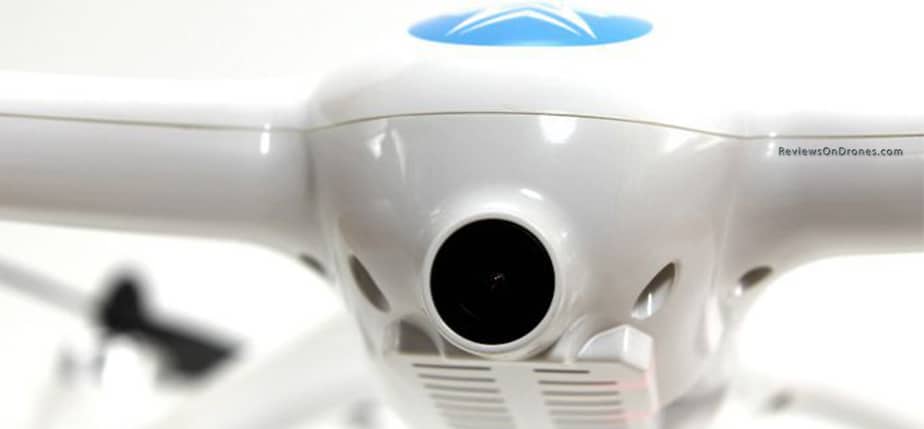
Outlaw SE Camera
If you’ve flown an Altair Aerial drone before, it’s highly likely that it came with a mount for an external camera (such as a GoPro), which has become somewhat of a standard for Altair in their design process.
With the Outlaw SE however, Altair Aerial have chosen to include a built-in 1080p HD fixed angle camera, which allows the pilot to take both photo and video direct from the controller, without the hassle of having to download and integrate a third party app.
For some, especially beginners, this is perfect as it helps to keep the overall flight cost down, meaning that you don’t have the added expense of having to invest in an external camera, which can often set you back several hundred dollars.
For others, potentially more experienced pilots who want higher quality from their photo and video, this might be enough to swing their decision on whether this is the drone for them or not.
To be fair though, the photo and video quality from this 1080p HD camera is at a good enough level that we’re confident most people will be happy with the results.

And remember, the Outlaw SE is also a First Person View (FPV) drone, which means you have the option to receive live video transmission to your mobile device connected to the controller, whilst the drone is in flight. It’s not the fully immersive FPV experience that you get from wearing a set of dedicated Goggles, but it’s still a fabulous feature for a drone that has an beginner-level price point.
In closing, but still on the Outlaw SE camera, it’s important to note that in most cases your purchase will not come with an SD Card, so you will need to buy this item separately. We recommend a minimum of 32GB if you plan to record video footage.
That being said, if you are flying with a mobile device connected to the controller, you do have the option to save photo and video direct to that device, which makes accessing, editing and sharing them really convenient.
Outlaw SE Performance + Flight Modes
The Outlaw SE comes with an impressive and very acceptable transmission range of about 600m / 1968ft… which for most beginners and intermediate level pilots is more than satisfactory to take some quality photos and shoot decent video.
And, as highlighted earlier, the Altair Aerial Outlaw SE is a GPS connected drone. This means that when flown outdoors, if the GPS Flight Mode is turned on, the drone will seek to automatically connect to a series of GPS satellites, which allows for an easier, more accurate flight experience and greater stability for those aerial ‘money’ shots.
Being a GPS drone, it also allows the Outlaw SE to come equipped with a handful of outstanding auto-flight features, including:
- Follow Me, which essentially tracks your movements on the ground from above your head, at a safe and pre-determined distance. This can be a fun feature to activate when running, cycling, or doing an activity that involves movement.
- Headless Mode, allows you to forget about which way the drone’s nose and tail is facing, and instead simply focus on just navigating it in the direction the joysticks are pressed.
- Altitude Hold, retains the height of the drone in the sky from the ground, regardless of whether the drone is in a roll, pitch or yaw.
- GPS Flight Mode, or Global Positioning Satellite (GPS) connectivity, as mentioned allows for an easier, more accurate flight experience and greater stability for aerial photographers and videographers.
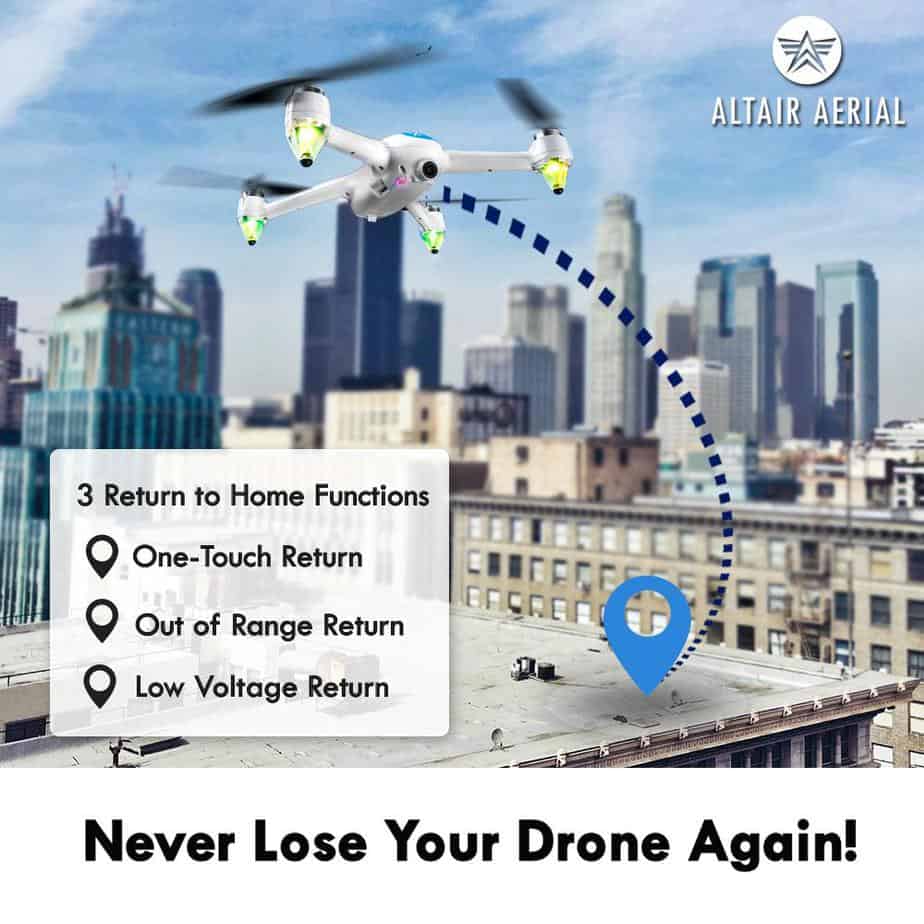
- Return Home, navigates the drone back to its home point (or departure point) in the event that the relevant button is pressed manually, or automatically if control communication is lost or low battery is detected.
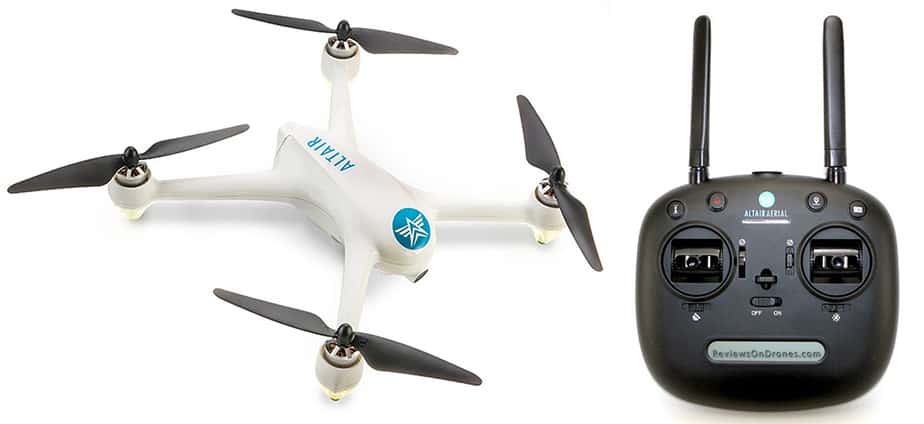
Outlaw SE Controller
You’ll find there are just seven buttons and two joysticks on the controller, which is comfortable to hold and simple to use.
The ON/OFF button is clearly marked in the center between the two joysticks, and below that you will find a small display screen.
On that display screen you will find, among other things, notifications for the signal strength between the Outlaw SE drone and its controller.
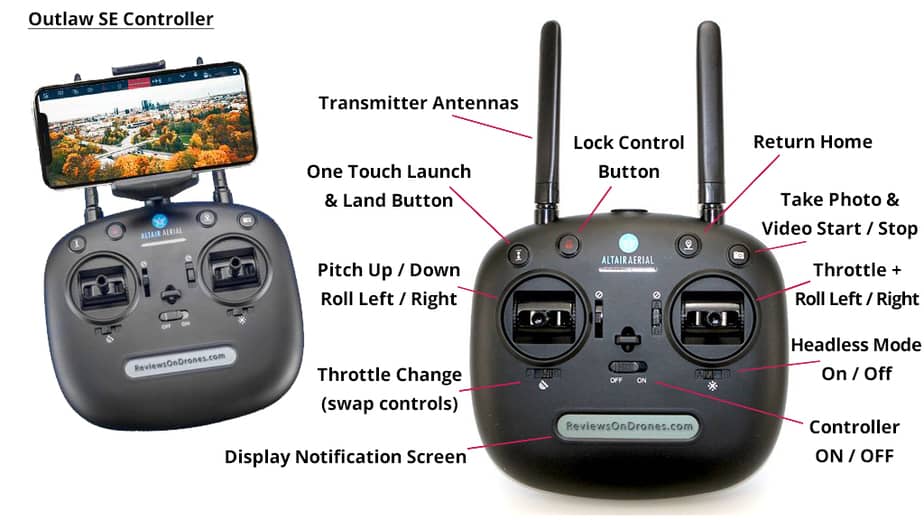
You will also find a notification that the GPS is either on or off, with the control button for the GPS located just below the left joystick.
Below the right joystick is the Return Home button, a fail-safe feature which all beginner pilots should know about and be ready to press in the event of a potential crash or low battery. Thankfully, the drone is ‘smart’ enough to do this for you automatically as well.
Back to the display screen, and next to the signal for the GPS, you will then see a satellite number for the drone you are flying. That number is important to note as it indicates how many satellites you are connected too, and should read 7 or higher before you can fly with GPS control.
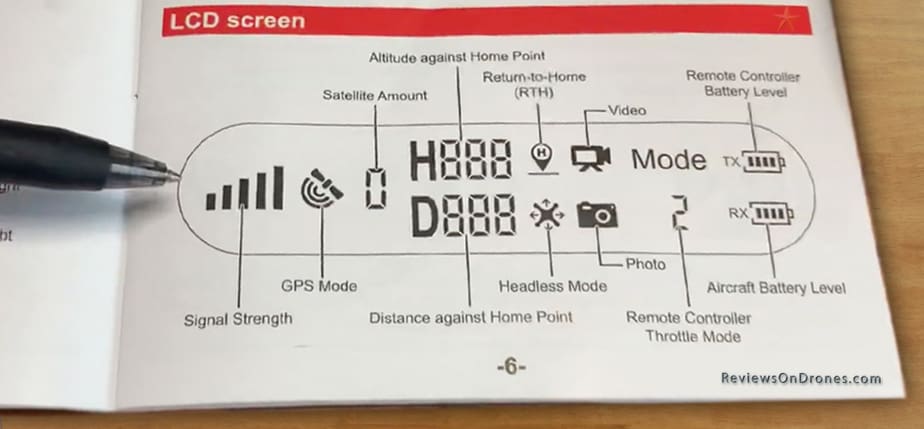
Also on the display screen you will see the letter H, which confirms the altitude of your drone against its home point (or departure point).
Below the letter H, you will see the letter D and this gives you an indication of the distance of your Outlaw SE drone from the home point.
It’s important to be aware that you will only get a reading for either of these when your GPS is successfully connected. If there is no reading, then GPS is is not in operation.
To the right, you will see icons for Return Home, Headless Mode, Video and Photo indicators. These are highlighted when you are using the function.
There is also an icon for the Remote Controller Throttle Mode, which will give you the option to either fly left-handed or right-handed. The icon will tell you which hand the throttle mode has been set to, by indicating either the Mode 1 or Mode 2. The default mode on your display screen will be Mode 2, which means that the drone controller has been automatically set for you to fly right-handed. However, if you are left-handed or prefer the throttle to be the left joystick, then you can just alter that to Mode 1 before take off.
And finally on the display screen, you will find the battery level for the controller and the battery level for the drone itself on the far right. The drone battery indicator will be at the bottom of the display screen, and is one of the more important indicators which you should be aware of at all times.
Outlaw SE Connection + Calibration
When you first take the Outlaw SE out to fly, you’ll have to complete the drone calibration and connection process with the controller. In most cases this is a one-time set up exercise, and not something you’ll need to repeat moving forward… although compass calibration is always recommended to avoid error and optimize your flight experience.
To start the connection process, you first press that lock control button, located on the top left of the controller, then at the same time you next press the ON/OFF button on the center of the controller to turn it on.
You should now see a red blinking light at the top center of the drone controller, and that will be closely followed by a single beeping sound.
Once that happens, you will then push the battery into the drone and lock it in. Subsequent to that you will see the drone’s LED lights come on and start to flash… and after eight seconds you will hear another beep. Once you hear that second beep, you are ready to start the calibration process.
To do this, simply hold the drone body in your right or left hand with its nose facing away from you and its tail facing towards you. Next you simply rotate the drone three times horizontally until those LED lights change from yellow to green.
You will then need to do the exact same thing again, but this time the drone must be held vertically and rotated with nose to the sky and tail to the ground… remembering to complete this step also three times.
When done, the LED lights on the drone should change from green to yellow and red. Once that happens, you will then press the lock button on the Altair Aerial Outlaw SE controller to lock the drone as your calibration process is now complete.
Now you might be thinking why share these steps in a review? Well, it’s really just to illustrate and demonstrate how simple the controller is to use. It’s not complicated, and has been designed to suit pilots of all ages (noting that Altair Aerial do recommend 14 yrs and up).
Here’s a quick 60 second video by Mike from Altair Aerial showing you just how fast it is to connect and calibrate the Outlaw SE drone to its controller.
Outlaw SE Battery + Charging
One of the major benefits of owning the Altair Aerial Outlaw SE is that you get a generous flight time of between 18–20 minutes on a single battery… which for a drone that costs around US$250, this is exceptional… and remember, that’s an easy number to increase by simply investing in a couple of additional batteries.
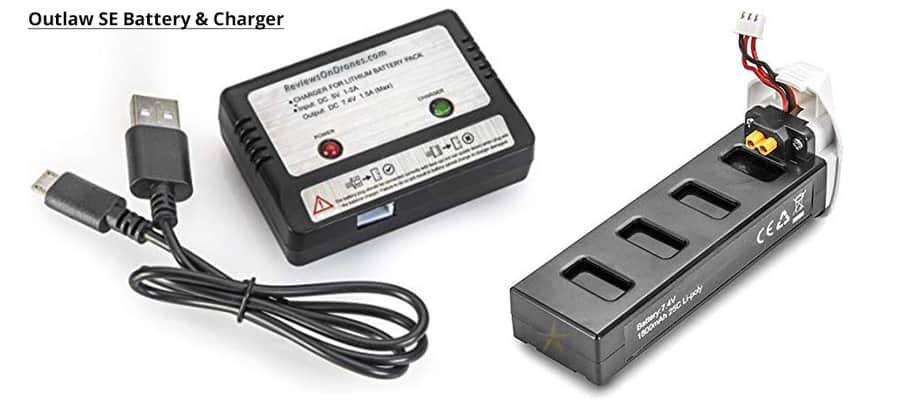
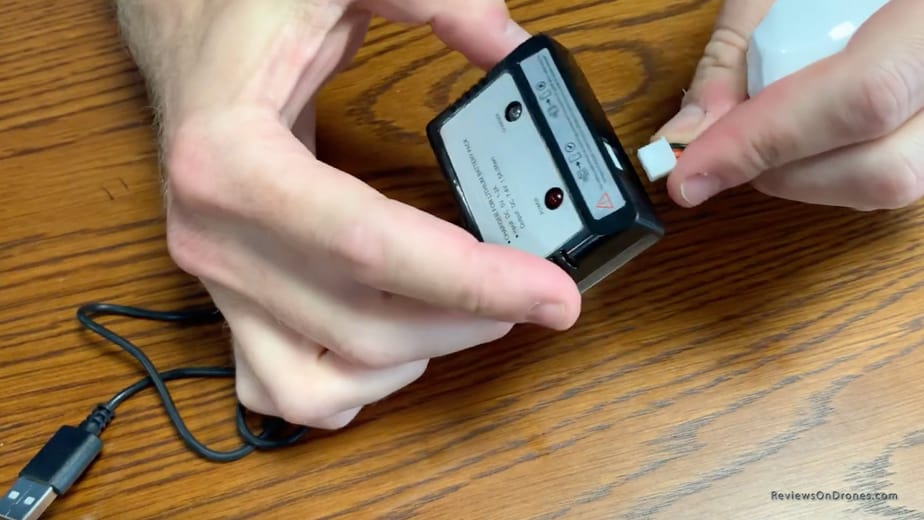
To charge your drone battery, which is a 7.4V 1800mAh LiPo, simply take the cable with the plastic end that comes out the battery, and plug it into the charger that has been included in your kit of parts along with the drone.
The charger comes fitted with a USB cable of its own at the other end, which you then plug into a USB port to charge. This is a fairly standard method of charging, which we love as it allows you to charge your drone from a laptop or wall socket with the right adaptor, or even car charging socket whilst on the go.
In most cases we don’t recommend charging batteries unattended, and especially overnight. Instead we suggest you plan ahead to have these ‘juiced up’ and ready to go a day or two before your flight.
When you’re done charging the battery (or batteries), simply fold the charging cable up neatly into the battery end cap, then slide the battery into its compartment on the drone, which you will find at the rear of the Outlaw SE body.
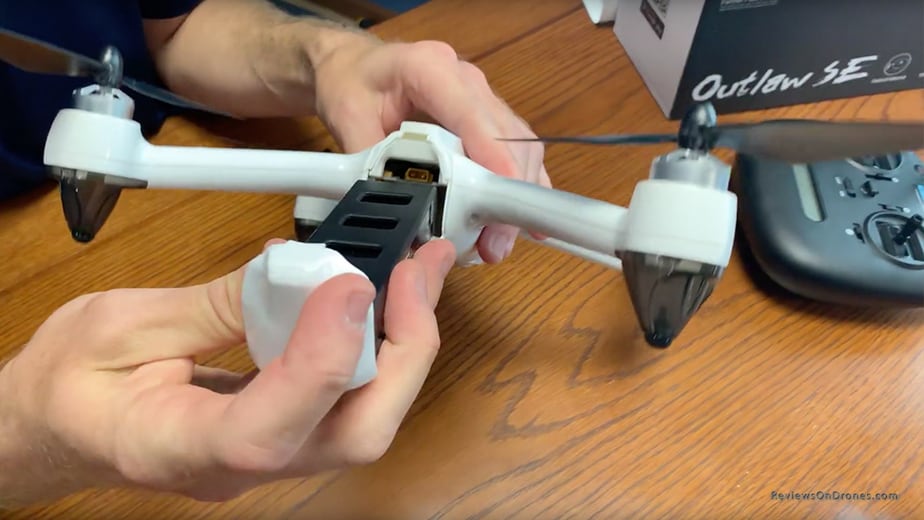
Once you slide the battery into the drone, you will hear a beeping signal at which point it will then be safe for you to lock the battery casing in place.
And finally, the Altair Aerial Outlaw SE controller takes four AA batteries, which are not included in your purchase. We’d recommend you have a minimum of 8x new and fully charged AA batteries in your travel case at all times, to save the disappointment of having to land because you can’t use your controller!
Outlaw SE Spare Parts + Accessories
In case you’re not aware, Altair Aerial are a family owned and operated US manufacturer based in Lincoln, Nebraska. They are widely known for their hands-on approach to designing and building good quality low cost remote controlled products, and have a great reputation for customer service.
If you did need to get in touch with them directly, potentially for technical support or to buy some spare parts, they are usually quick to respond.
Batteries, chargers and propellors are the most common spare parts you’re likely need, and to give you an idea on pricing, here’s a list of what they would cost you through Amazon.
Outlaw SE Considerations
This wouldn’t be a fair and honest review of the Altair Aerial Outlaw SE if we didn’t list out the things we found in our testing that might affect your decision to buy this drone.
First off, the Outlaw SE is a fixed-arm drone… it’s not foldable… and this does make travelling with it a whole lot more complicated if space is at a premium. Foldable drones that weigh less than $250g are becoming more and more popular by design, and so you should be clear on what you’re likely to do with this drone, and where you’re going to want to fly it.
Then there’s the fact that the built-in camera is fixed in place, which means you literally need to point the drone in the direction you want to shoot or film, making it a little limiting for the more experienced photo and video enthusiasts.
Next is the fact that we didn’t get a second battery included in our purchase price, although you could argue that Altair Aerial did it this way to keep the costs down as low as circa US$250. For us this isn’t a game-changer, especially as buying a few spares won’t set you back too much, and afterall, you do get around 18-minutes flight time on a single battery anyway.
But here is why we say it would have been nice to get a second battery included. Each time we’ve needed to charge the Outlaw SE battery, it’s taken us 4-5 hours just to charge one, and a combined 10 hours to do both! Now of course this can a manageable problem with the right planning, but it’ll potentially catch you out if you only remember on the morning of your flight that it still needs to be done!
And lastly, we should highlight that the Outlaw SE doesn’t come with Obstacle Avoidance… so we’d strongly recommend that if you’re a less experienced pilot, then you focus on flying in wider open spaces where obstacles don’t even become a consideration. In truth, most drones at this price don’t have that level of technology anyway, but it’s worth mentioning for those of you that have a bigger budget and are happy to spend a little more for that comfort factor. Personally, we believe it’s better to focus on mastering your piloting skills manually and in the right environment, than it is to lean on tech to get you out of trouble because you did’t know what to do at that time.
Outlaw SE Competition
Over the last few years, the ‘below US$300’ drone market have been flooded with options, making more competitive than ever. To that end, whilst we do like the Altair Aerial Outlaws SE a lot, buying a drone is a personal choice and you should do your own research to make sure you’re buying the one that best suits your need. Here’s a list of potential alternatives.
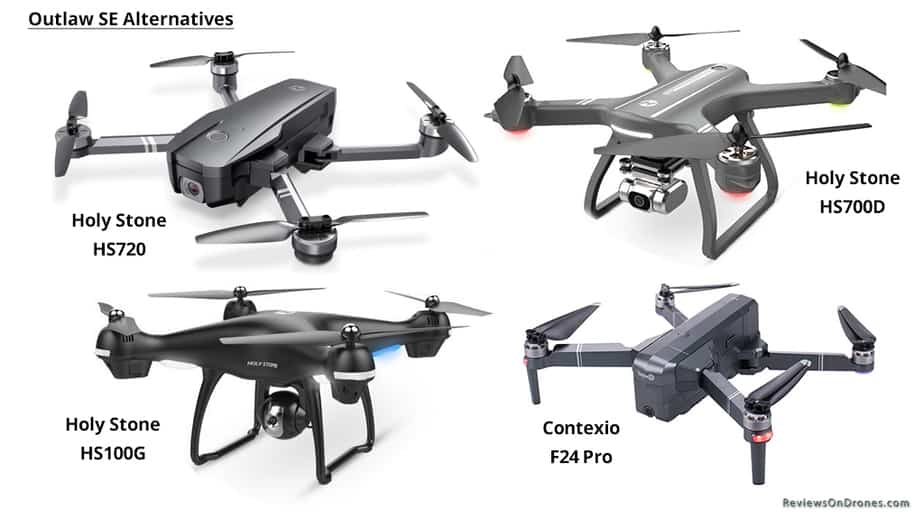
The Holy Stone HS720 handles better than most drones that fall within this price range, and is comparable to the Outlaw SE, albeit a little more expensive.
The Holy Stone HS700D FPV has a camera which will shoot video in 2K. It is hard to match that kind of quality when searching for a drone that falls within this price range.
The Holy Stone HS100G will provide you with an outstanding Field Of View (FOV), which enhances the camera experience significantly.
The Contixo F24 Pro flies longer than most drones that fall within this price range, and is foldable which makes it easier to travel with.
The Bottom Line
The Altair Aerial Outlaw SE is a super beginner-friendly drone that’s easy to assemble, fun to fly, and packs enough features and benefits to keep even the more experienced drone pilots interested.
In essence, you could say it’s the perfect beginner drone that you’ll be able to keep flying with as your skills, experience and confidence grows.
Would we buy the Outlaw SE? Yes, 100%. For around than $US250 it’s a ‘serious training drone’ that we think you’ll thoroughly enjoy flying.
Here’s a video reminder of the features that the Altair Aerial Outlaw Special Edition drone has to offer.